Horn is an important tool in every car and bike. It helps to alert the other motorists on the road and enjoy a safe driving or riding experience. On crowded roads, it becomes a necessity to have a loud horn that is easily audible to everyone but it shouldn’t be obnoxiously loud either that could create nuisance on the roads. Retrofitting a horn isn’t a tough job to crack and you can learn how to fit horn in car and bike in a couple of minutes.
How to Fit Horn in Car and Bike
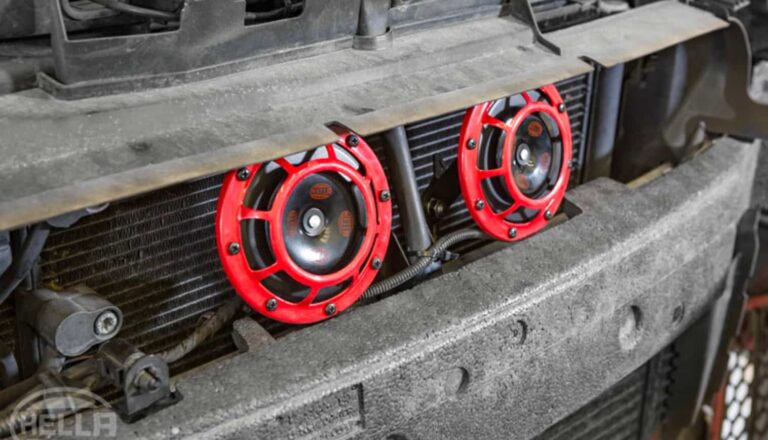
Before even starting to look for tools, you need to read the owner’s manual to locate the horn placement and read the instructions booklet provided with the new horn. In addition to that, you are also supposed to calculate the power consumption of the new horn and find out if the onboard wiring of the car/bike can cope up with the additional power requirement on not. Horn placement in cars is generally behind the front grille or lower bumper, depending on the make/model of your car.
Now as you have read the instructions and found out the placement of the horn, it’s time to go ahead with the process:
Step 1 – Before starting, detach the negative terminal of the battery. It is essential to negate the chances of a short circuit while replacing the horn. For additional safety, also take out the fuse of the horn. Generally, the fuse box is positioned near the engine bay itself.
Step 2 – Undo the 12mm nut to remove the horn. In most cars, you can access the horn through the cavity between the body panels and the engine. However, in the case of some high-end vehicles, you need to take off the front bumper in order to reach the horn. Once that is done, remove the wire connection of the old horn in order to take out the old horn.
Step 3 – Check the terminals of your new horn. The terminals of the new horn should match with the old horn for a simpler installation process. If both the horns sport single or double terminals, you can just replace the new one with the old one. But in the case of an extra terminal with the new horn, you can make a jumper with a fork terminal at the front end and a spade terminal at the lower end.

Get best deals on Car horns on Carorbis
Step 4 – Use crimp connectors for connecting the wire with the new horn. In the case of a single terminal, connect the main wire with the horn via the crimp connector. In the case of double terminals, use a jumper and connect one end with the second terminal and one end to the nut the horn is mounted on.
Step 5 – Insert the horn fuse into the fuse box, at the location it was before, and also connect the negative terminal of the battery. Test the new horns and enjoy your future road trips.
The method to fit a horn in a bike is similar to that of a car. You need to have a compatible horn for your bike. With a compatible horn and instructions in place, you can follow the same steps to replace a horn on your bike as well. Finding a compatible horn for your car or bike is important. Your car should be able to deliver the power to the horn without any trouble. You can check Carorbis to select from a range of car and bike horns from renowned brands like Bosch, Roots, Senbao etc. Carorbis offers car and bike horns at the best prices, right at your doorstep.
So here is how to fit horn in car and bike from the comfort of your home. If you found this article informative, make sure to check out other interesting reads on the Carorbis Blog and also read How to Recharge a Car Battery