Restoring car headlight lenses can be done easily at home and offer professional-like results. The plastics used in headlight lenses can become foggy and dull over time. This can be due to scratches, dirt, grime or oil on their surface which prevents the headlights from shining brightly. Luckily, there is an easy fix to get them shining bright as new. You can restore headlights at home professionally.
Cloudy car headlights not only look bad, they also are a safety issue because they cause decreased illumination during night driving which may lead to a road mishap.
However, you don’t need an expensive fix to get them restored. They can be brought back to new condition with simple tools and things you can find around the house like toothpaste and baking soda.
How to Restore Car Headlight Lenses
If the inside of the lens is damaged, then you would have to get a replacement. But usually, it is only the outer surface of the headlight lens that needs restoration.
Follow these easy steps to restore the lenses of your car headlight.
Materials required
- Masking tape
- Micro-fibre cloth
- Abrasive sandpaper and fine sandpaper
- Toothpaste
- Soap and water
- Gloves
- Polishing compound
- Wax
- UV sealant
Step 1
Wash the headlight lens with soap and water trying to get off as much dirt and grime as you can. After thoroughly washing the lens, dry it with a micro-fibre cloth to get all the moisture out.
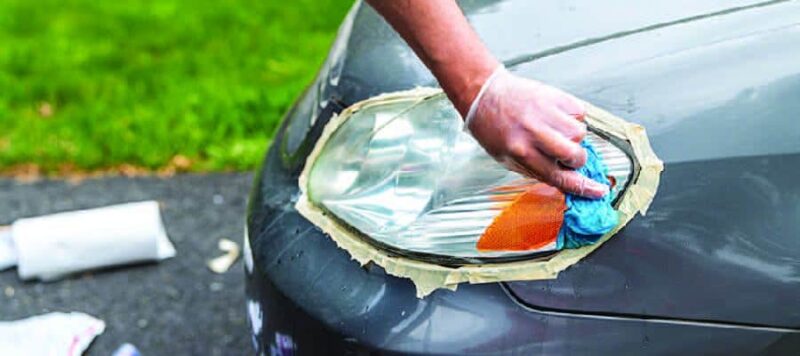
Mask the painted areas around the headlight lens and assembly using the masking tape. Make sure to cover all the painted areas because you don’t want any scratches or damage to the paint.
Dip the abrasive sand paper into water and lightly start scrubbing the lens in circular motion. Don’t add too much pressure because it may cause scratches on the lens. Keep using water to wipe away the grit and never use the sandpaper dry because this may damage the lens.
Step 2
Progressively move to the finer sandpaper and keep working in circular motion. Keep rinsing the lens to mark your progress and to ensure there are no scratches on the lens.
Once you are done with the sandpaper, you can start with the toothpaste. Use some toothpaste on the lens and utilising an old toothbrush, lightly scrub the lens. The toothpaste has some compounds in it that will brighten the lens and get rid of the stains and fogginess.
Wash the lens with soap and water and dry it with a clean cloth. If there is any material still stuck on the lens, repeat the washing process until you have a clear lens.
Step 3
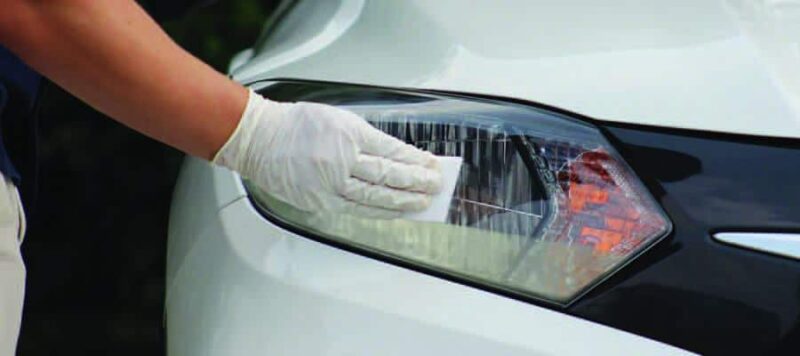
Add some polishing compound to a wet microfiber cloth and apply it to the surface of the lens in a circular motion. Keep polishing one area and move to the next area once you are satisfied that the polish has done its magic.
Using a microfibre cloth is essential to prevent any scratches on the headlight lens.
After you finish with the polishing compound, you can buff to a high, shiny finish with a dry microfiber cloth.
Next, add some polishing wax to the headlight lens and keep buffing with the dry cloth until the surface becomes bright, shiny and absolutely clear. You can see now that light can shine brightly through the lens.
Turn on the car headlights to see how brightly it shines now.
Step 4
Finally add some UltraViolet sealant to keep the polish and wax intact over the lens. The UV sealant will keep the lens in a polished state for longer and protects the lens from further damage.
Allow the UV sealant to dry and then use a microfiber cloth to buff it.

Conclusion
Depending on how foggy your car headlights are, you may have to repeat the process mentioned in this guide. But you should start to see improvements in your headlight illumination the first time you carry out this process.
To keep the headlights absolutely clear, you can wash them often with soap and water to prevent the build up of grime and dirt upon the lenses.
Always use a soft brush and microfibre towels to prevent any scratches on the lenses. Also use polishes and waxes that are suited for plastic lenses because they may get damaged otherwise.
This DIY guide work wonders and can be done in a short time from the comfort of your home. There is no need for expensive repairs or hiring a specialist to do the job.
If you liked this blog, then check out how to adjust the headlight of your car at home.
Frequently Asked Questions
Q1. How can I make my car headlight lenses clear again?
Ans. Leftover toothpaste can be used to restore the headlight lens. There a re abrasive elements in toothpaste that can remove any built-up residue on the lenses. You have to apply the toothpaste to the affected areas that need attention using a clean cloth or even an old toothbrush.
After the toothpaste has been rubbed in well, give it a rinse with clean water and wipe it down with a clean dry cloth. The lenses should look like new.
The active ingredient in toothpaste is baking soda so you can use plain baking soda as well. Put baking soda on a damp rag and work it into the headlight lens. The cloudy parts of the lens will become clear and ready for use when you hit the road.
Q2. Can the headlight lens be restored?
Ans. The best way to restore headlights’ is to buy a headlight restoration kit. These kits essentially have the following items:
- Wet/dry sandpaper
- Rubbing compound or polish
- Wax in paste form
- UV sealant
You will also need some masking tape and microfibre towels.
Use masking tape to protect the paint on the hood and the bumpers. Sand away using the sandpaper. But remember to use water on the lens so that you don’t scratch the headlight. Use an abrasive type of sandpaper to remove all the cloudiness on the lens.
Rub in the polish and buff with a clean microfibre cloth. Then add in the wax to seal the lens.
Finally add in the UV sealant. This compound will keep the lens clear for a long time and won’t allow it to get cloudy again.
Q3. How do professionals restore car headlights?
Ans. Professionals restore headlights in much the same way you do it at home, using a headlight restore kit.
First the surface of the lens is cleaned and sandpaper is worked into the lens to remove the deteriorated coating on the lens. The headlight is then washed again to remove any residue which might remain.
Masking tape is added to protect the paint work from getting scuffed. Polish and wax compounds are rubbed into the lens to give it a new coating that will allow light to pass through it. Finally a UV sealant is added and allowed to cure so that the polish and wax are sealed into the lens. Curing takes about 5 minutes. The UV sealant is a clear coat that protects the lens from further damage or deterioration.
Q4. What household items can I use to restore headlights?
Ans. Some of the household items you can use to restore headlights are warm water, dish soap, sponge, microfibre cloth, baking soda, toothpaste, denatured alcohol, etc.
Dish soap is a great way to clean the headlight lens of dirt and grime without causing damage to the lens. Make use of a soft sponge or microfiber cloth to clean the lens. Use a circular motion to prevent any scratches and let the soap work its magic for about 5 minutes. You can then clean off the soapy water and dry the lens.
Baking soda and toothpaste work the same way in that they have ingredients that dissolve away the deterioration from the headlight lens. You can use an old toothbrush or a microfibre cloth to wipe in the compound.
Repeat, if necessary, until the headlight lens is clean. Finally use a coat of car wax to seal the lens. Take a small amount of car wax and rub it in circular motions. Buff it out with a clean cloth until it shines.
Q5. What is the best way to clean oxidised headlights?
Ans. The best way to clean oxidised car headlights is to mix shampoo or dish washing soap with water and dip a clean microfibre cloth into the solution. Wipe the entire surface of the headlight lens with this solution.
In another container, mix vinegar with baking soda and start wiping the headlight lens with this mixture. The fogginess and cloudiness should begin to disappear as you wipe the lens. Then simply use water to clean off any leftover residue.
Your car headlights should be shining like new now, so you are ready to hit the road.
Q6. How do you restore badly oxidised Car headlights?
Ans. For badly restored headlights, it is advisable to take the car headlight out of its assembly and thoroughly have it cleaned. Remove the chrome and metal housing of the headlight lens. For any screws that are hard to remove, spray some WD-40 or penetrating solvent to ease them out without causing damage to the threads.
Wash the lens completely with automotive soap, or car wash shampoo. Make sure to wash the inside of the lens as well because that is where some of the oxidation might remain.
Rinse the headlight lens with water to get rid of any debris, dirt or grime and then dry it out with a clean microfibre cloth taking care not to scratch the surface of the lens.
Then add a rubbing compound, polish to the lens, using circular motions to work the solvent in. After the polish, apply a UV sealant to protect the lens from further damage.
Carefully reassemble the headlight lens and the headlight covers with the chrome and metal fittings. The headlight should not be able to glow bright and is ready for use.
Q7. How do you get rid of cloudy film on car headlights?
Ans. First clean the lens with a mild cleanser such as soap and water. Clean the surface of any dirt, oil or grime that may be sticking to the surface.
After the wash, dry the lens with a clean towel until the lens is moisture free. Next apply any kind of restorer to the lens such as toothpaste or baking soda. If you are adding baking soda, make a thick paste and leave it on the lens to work for at least 5 minutes.
Use an old toothbrush, or a soft brush to gently scrub the lens. Use circular motions and do not apply too much pressure to the lens, because you don’t want to scratch the surface.
Clean off any excess residue with a clean towel. Wash away any dried bits and buff to a bright shine. You can now use some polishing compound to add an extra shine to the lens which will allow it to glow brightly when the lights are on.
The fogginess should disappear by now and you are ready to drive your vehicle.
Q8. Does Coke clean Car headlight lenses?
Ans. Yes it does. First, wipe the lens clean with a dry towel to get rid of any dirt. You can even use an automotive wash or soap and water to clean the lens. Be sure to wipe it dry after you finish with the cleaning.
In the next step, take a can of Coca Cola and pour it on the headlight lens. Ensure not to stain the paint work with the drink. You can also soak a sponge in Coca Cola or use a towel with the drink to apply on the surface of the lens. The Coca Cola drink can also be used in a spray bottle.
Leave the Coca Cola to work on the headlight lens for at least 10 minutes. Then wash it away with soap and water.
If the lens is still foggy after the treatment, try and repeat the process until all the fogginess is gone. If it still doesn’t work, try using a headlight restoration kit or consider fitting a replacement lens.
Q9. Does rubbing alcohol clean headlights?
Ans. This method involves using sandpaper and rubbing alcohol to clean the headlight lens. The sandpaper is used as an abrasive material to shave away the grime from the headlight lens. Apply some masking tape around the headlights to save the paint from any scratches.
Use a little bit of water with the sandpaper, and work in circular motion to scrape off the deteriorated surface. Use the sandpaper lightly to avoid any scratches on top of the lens.
In the next step, use some rubbing alcohol on the surface of the headlight lens. The rubbing alcohol will immediately evaporate leaving behind a dry surface. If there is any residue still left, wipe with a microfibre cloth.
The headlight lens might be completely transparent now, but its still a good idea to rub it with toothpaste or an automotive polish and buff to high shine. The lens will stay protected for longer this way.
Q10. Will vinegar clean car headlights?
Ans. Vinegar is slightly acidic in nature due to the acetic acid present in it. Because of this acidity, it can dissolve grime, dirt or residues quite easily from the headlight lens. It can be used to clean the foggy, discoloured surface of the lens.
Vinegar acts as an excellent headlight lens restore compound. Even windows, windscreens and other glass surfaces can be cleaned using vinegar.
Mix one cup of vinegar with three cups of water to make a solution. Spray this solution over the headlight lens and leave for a few minutes for it to work. Finally wipe off the solution with a clean cloth. The vinegar should have dissolved all the dirt and fogginess from the headlight lens.
Q11. Can lemon juice clean headlights?
Ans. Lemon juice in combination with baking soda is helpful in cleaning foggy lenses. Car headlight lenses get foggy over time due to dirt, grime and oil. Luckily, it is only the surface of the lens that gets damaged.
Lemon juice is slightly acidic and this helps dissolve the layer of fogginess on the lens. All you need to do is cut the lemon in two and apply baking soda to the cut surface. Then simply rub the lemon on the headlight lens as an abrasive material and leave it on for about 5 minutes.
Rinse with clean water and your headlights will look good as new.
Q12. Can you use a polishing compound on headlights?
Ans. The two types of compounds used for cleaning headlights are polishing compound and rubbing compound. Rubbing compound is a little bit gritty and heavier in consistency and can be used as an abrasive compound to get rid of all the dirt and grime that is built up on the surface of the headlight lens. Polishing compound is thinner, gentler and can be used after the rubbing compound to get a good shine by buffing.
Q13. Does brake fluid clean Car headlights?
Ans. Yes, brake fluid can be used to clean headlights. First you have to wash the lenses with warm water and a soap solution. Dry using a towel to get rid of all the moisture.
Next use a sandpaper and gently scrub the headlight lens in a circular motion. Use some water with the sandpaper to prevent any scratches. Sand off the foggy parts of the headlight lens.
Add brake fluid to a cloth and apply it to the lens in a circular motion. Continue cleaning the headlight lens with the brake fluid until the lens clears up and all the dirt has gone away.
You can then polish the lens with a polishing compound and buff to a fine finish.