Regular checking for the functioning of turn signal bulbs is necessary as failure of it may lead to accidents.
Turn signal bulbs are the indicators which we use to infer to fellow riders that we are going to take a turn towards the indicated side. If it is not properly followed then cars or bikes behind or ahead of us may crash into us and cause an accident. So, to avoid accidents related to turning we must regularly check if the turn signal bulb is working.
Easy steps to replace the turn signal bulbs in bikes.
Non-working of turn signal bulb can be due to a damaged bulb or some wiring issues in the bike.
It’s best to first replace the bulb and see if it is working as the wiring issue is rare and checking for it is cumbersome.
So, here’s how to do it:
-
Check which one is not working
To start with, we first need to check properly which ones are not working. For example, suppose you’ve noticed that the right-side signal of the rear doesn’t work, still check for all the other ones and find out.
Check for both front and rear.
-
Find out the type of bulb you need
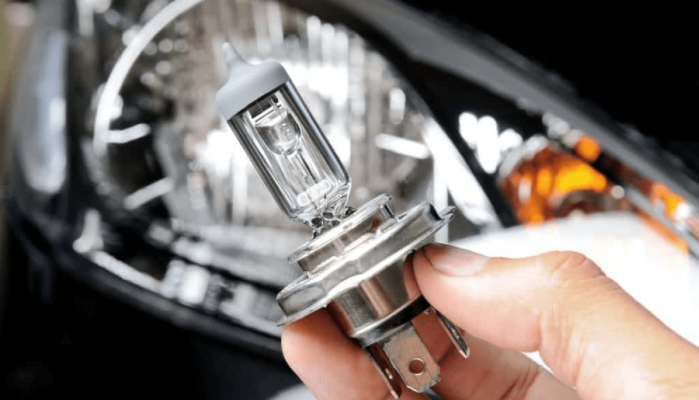
Various types of turn signal bulbs are available in the market. All bikes don’t use the same type of bulb. It’s good if you know the type of bulb you need or the dealer may also advise the type upon knowing the make and model of your bike.
But follow the next steps if the dealer isn’t aware of the proper bulb. You need to take the existing bulb to the dealer in this case.
-
Dismantling the turn signal cover
A bike turn indicator set looks like this. Repair shops may advise to replace the whole set but we can just replace the bulb to save our bucks.
The front transparent covering needs to be removed for replacing the bulb. Before proceeding further, turn off your bike completely to avoid getting any shocks.
Search for the screws holding the cover in the back side or on either side. You’ll find 1-2 screws securing the cover. Now, we need to bring our toolbox and unscrew these screws using an apt screwdriver.
After removing the cover, we will find the bulb holder attached to the reflector (the shiny silvery plate). We need to unscrew the holder to remove the bulb or it may be stuck to the reflector. Again. Find a suitable screwdriver and unscrew the bulb holder.
Now, press and rotate the bulb and it’ll come out of the holder.
Here you can ensure again if the problem is with the bulb only. A damaged bulb will show broken filament or have black surface glass.
-
Purchasing the suitable bulb
Now if you didn’t know which bulb would be suitable then you need to follow this step first. After removing the damaged bulb, take it to an automobile shop and show it and they’ll give you a new bulb of the same type. It will cost around rs100 for a pack of 4 bulbs.
-
Checking the new bulb for function
At the store itself, you should ask the seller to show you if it’s working.
They’ll test and show it to you.Then fit the bulb in the holder of your bike and check if it is working. If it doesn’t work then you need to do a wiring check.
-
Fixate the cover into the set again
If the bulb is working then again fit all the things back. Make sure the screw the bulb holder or else the holder will not stay in place and the bulb may break upon hitting the cover. Now, also screw the cover back.
The job is done!
Please note that these procedures are only for bulb setup turn signal lamps and may not be applicable to led setups. For led turn signals, we may need to replace the whole set if the led bulbs are not removable.
Replacing turn signal bulbs in cars:
In car also if a signal bulb is not working, it is best to try and replace the bulb first before doing a wiring check.
-
Disconnecting the wires
First, after finding the faulty bulb, look for the connection plug behind the bulb casing. Remove the plug before any further operations. For front signal bulbs not working, you’ll find the connecting plug after opening the engine bay.
For the rear side, open the boot to find the connections.
-
Find the correct signal casing
Next step is to find the correct casing. There will be headlight casing and turn signal casing in the front which may be confusing. Take time and locate the correct casing.For the rear side it isn’t so difficult as we won’t have many casings here. In the rear generally a single casing hosts all the other bulbs too like reverse lights and brake lights.
-
Removing the bulb from the casing
This step isn’t so easy in cars.
For the front, if you can see the casing from the engine bay then your hassle will be less. Reach out to the casing and try turning the bulb holder clockwise or anticlockwise or wiggle it and it will come out.
But if the turn signal lamp is in the lower portion of your car, then you won’t be able to reach it from the top of the engine bay. In this case, take a torch and lie down and go under your car. Here you will find the casing. Try rotating it or wiggle it. The bulb holder will come out.
-
Remove the bulb now
For the rear turn signal bulbs, mostly they’ll be attached to the body of the car by screws. Take apt tools and unscrew it. Take a torchlight for better vision. In the rear, there are other bulbs are also present. Now first identify which is the turn signal lamp. You can easily find that if the other side of your car is working. If both sides of the rear are damaged then you can refer to the car’s manual to find out. Additionally, you can check the car’s images on the internet or find out from someone who has the same car. Now remove the right bulb.
-
Purchasing a suitable bulb
After you’ve removed the bulb, take it to a repair shop and purchase a new bulb. It may cost about rs300 to 700 for a pack of 4 bulbs. You can purchase a single bulb or buy according to your need.
-
Checking for function and fixing it back
Now fix the bulb in the holder and before putting it back to the casing make sure it is working. After checking, fix the bulb holder.
For the rear, again screw the casing.
The job is complete and you’ve saved the service charges!
So, this was the A to Z of replacing a turn signal bulb. I don’t think you need to know anything more. Hope we at Carorbis could help you in your DIY task. Thanks for reading


