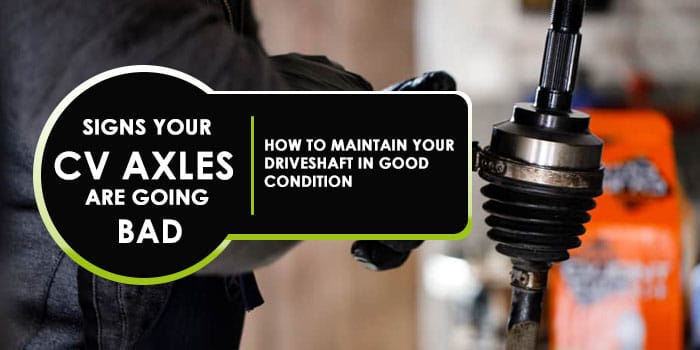
CV axles or constant velocity axles are used in front-wheel drive cars to connect the vehicle’s transmission to the wheels, thereby providing acceleration and speed. Without CV axles, power will not be transmitted effectively to the wheels. So how do you know if your CV axles are going bad? When CV axles go bad, you will hear a clicking noise while turning or vibrations while accelerating. Ignoring these symptoms may have disastrous effects as you may lose power to the wheels.
This article will outline all the details you need to know about CV axles, what to look for to keep them in good condition and how to replace them if they go bad.
What is a CV axle?
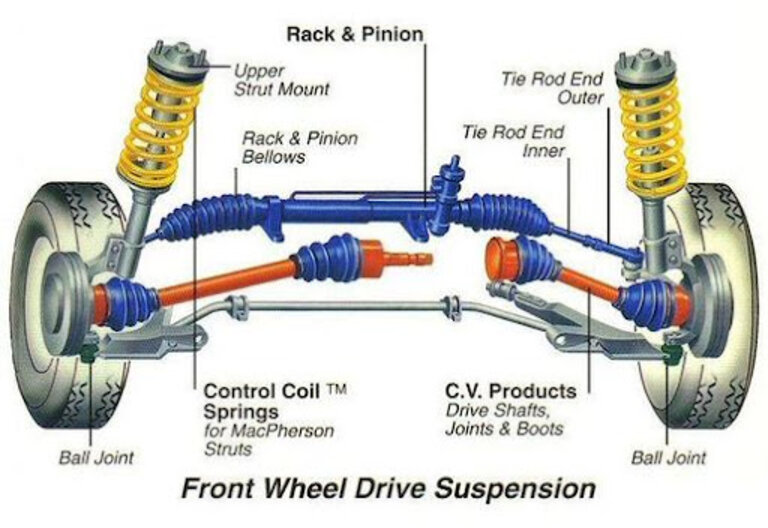
While the engine produces power, the transmission is used to transfer this power to the wheels via a CV axle. The wheels rotate and turn at different angles (they also move up and down with the suspension) so they need a flexible axle to provide power to them.
CV axles are mechanical components that provide the drive shaft with an axle to transmit rotational motion at various angles. The important function of CV axles is they keep the velocity constant, no matter the angle at which the wheel is positioned. This allows for smooth driving even when going around a corner. One end of the CV axle is attached to the wheel while the other end is connected to the differential of the gearbox. You may be wondering how many CV axles are on a car. Front-wheel drive cars typically have two CV axles, one for each front wheel. Four-wheel drive vehicles may have more than two CV axles because the engine needs to transfer power to the rear axle as well.
Most modern cars use CV axles based on the design of Alfred H. Rzeppa. These types of CV joints allow smooth delivery of power and a wide range of angles with a constant velocity of the axle.
Also Checkout Car Parts Name: Learn the Vocabulary of Popular Names of Car Part
How do CV axles work?
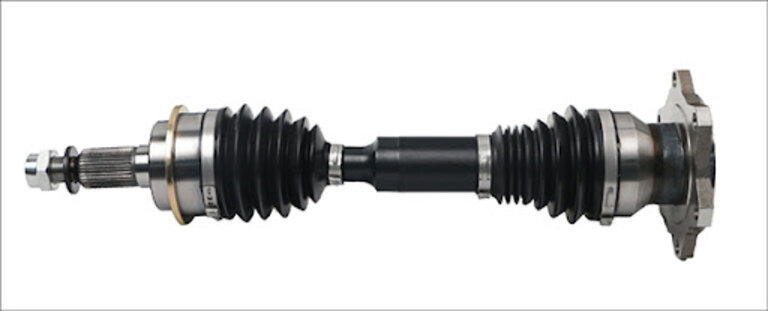
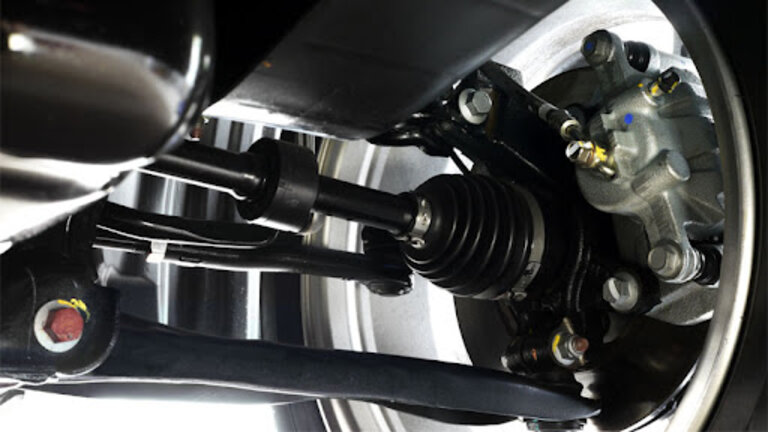
A CV axle consists of two joints connected by an axle. There is an inboard joint and an outboard joint named in relation to their position, near the differential or close to the wheel hub. The inboard CV joint connects the transmission differential to the axle while the outboard CV joint connects the axle to the wheel hub.
The outboard joint is known as a fixed ball joint and contains bearings between the inner and outer housing. The bearings are allowed to slide as well as rotate giving them a range of motions while maintaining a constant velocity. This flexibility allows smooth operation of the rotating wheel while going around a corner and while driving in a straight line. A flexible rubber boot is placed around the housing which contains lubricating grease to keep friction at a minimum between bearings. The boot also keeps dirt and debris out and protects the outboard joint from damage.
Inner CV joints compensate for suspension travel and don’t have to worry about steering angles because they are not connected to the wheel. Inner CV joints are on the transmission side and are called sliding joints because most of their movement is in the horizontal direction. All front-wheel drive cars make use of CV axles, while rear-wheel drive vehicles may also make use of them to connect the transmission to the rear wheels.
Also Read All About Wheel Bearings + Faqs
Why do CV axles go bad?
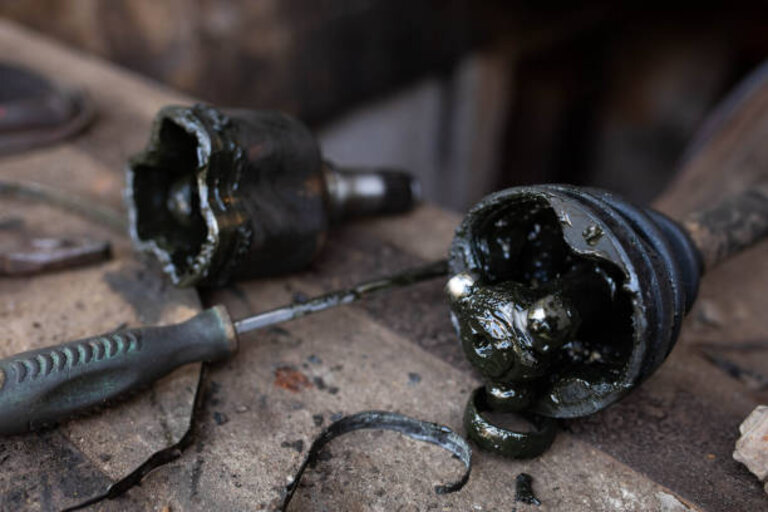
CV axles usually develop faults or damage due to rubber boot deterioration. Once this happens, there are several symptoms to identify that your CV axle has gone bad. The rubber boot holds the lubrication grease that allows the CV joints to rotate with minimum friction. If the rubber boot is damaged, it will lose its lubrication medium and the inner and outer CV joints will undergo wear and tear. Also, moisture, dirt and debris may enter the bearings and causes them to start rusting or corrode.
Here are some of the symptoms related to a damaged CV axle that you should be aware of:
Heavy vibrations while driving
When the CV axle is damaged, you will receive strong vibrations as you drive along. The bearings no longer roll evenly and this unbalanced rotation causes vibrations in the drive shaft. This vibration may creep into the steering and vehicle frame causing a deep rumble and bumpy ride. The vibrations will get worse at higher speeds or when going around corners. At this point, driving becomes unsafe because it may lead to loss of control or failure of the CV axle. It is advisable to have the CV axle replaced as soon as you feel vibrations while driving.
Also Read Disc Brake vs Drum Brake: Which one will keep you the safest?
Bumpy ride
A CV axle is supposed to work smoothly with suspension movements while the wheels turn. A bad CV axle may not be able to cope with modulations in the suspension resulting in an uneven ride. Worn bearings will cause the CV axle to rotate unevenly resulting in a bumpy ride. A CV axle should operate smoothly despite varying steering angles and movement in the suspension. The vehicle may also be subject to torque steer when accelerating. This is when the car drifts to one side as you step on the throttle. A bad CV axle could also put stress on the transmission and differential, so have it inspected as soon as you suspect damage.
Knocking or rattling noise
A common symptom of a bad CV axle is clicking or knocking noise while you go around a corner or attempt to change the steering angle while accelerating. The most likely culprit is a worn-out outer CV joint which is on the wheel side. The inner CV joint may be faulty as well, so if you hear unpleasant noises while driving, especially when turning, check out your CV axle as soon as possible. In the case of a worn-out CV axle, rattling noises will also occur even when travelling in a straight line. The cause is usually excessive wear from use or due to a damaged rubber boot that has lost its lubricating grease. Don’t keep driving when you hear the clicking, the CV axle may fail altogether.
Also Read Car Suspension – Working and Different Types Explained
Damaged rubber boot
All CV axles have a soft rubber boot that is filled with lubricating grease to reduce friction in moving parts. If the rubber boot gets torn, the grease will leak out of the rubber housing and end up on the wheels and tyres. Inspect the inner side of the wheel for grease leaks and have a look at the rubber boot for signs of damage. Replacing the rubber boot should suffice, but if the mechanical components of the CV axle have been affected, then you will have to replace the CV axle.
The symptoms mentioned above are indicating factors for a CV axle replacement. You can still drive with a bad CV axle as long as it doesn’t affect steering and suspension too severely. However, it is always safer to have your CV axles replaced as soon as you observe something wrong.
A good practice is to observe the rubber boot regularly for signs of damage. Replace the boot and use fresh grease if you suspect that there is a tear in it. Your CV axles will last longer and you will have a smoother ride.
Also read Top 5 Car Maintenance Fluids Essential For Your Car
How to replace a CV axle?
A bad CV axle can be replaced at home in the comfort of your garage using simple tools that you can buy at most car accessory stores. For the question of how much do cv axles cost, replacing CV axles is around Rs.3000 – 5000 if you can do it at home, but you will end up spending much more if you take it to a certified mechanic.
It will take you a couple of hours to replace a bad CV axle provided you are familiar with basic tools and procedures to work on your car. Since this is a drivetrain component, make use of safety gloves, and goggles and wear protective clothing.
Here are most of the tools and equipment you will need:
- Car jack
- Jack stands
- Tool box including wrenches, pliers and screwdrivers
- Lubricating grease
- Hammer
- A new CV axle with rubber boot, circlips and cotter pins
Ensure to park the car on a flat surface in the safety of your garage. Avoid using excessive force while the car is elevated, it is advisable to use wheel chocks to prevent the car from rolling away. Refer to the service manual for specifications of the CV axle, precautions and any vehicle-specific advice.
Set the parking brake on the car and engage first gear. Use the car jack to elevate the car and chock the rear wheels. Use jack stands to keep the car elevated while you move on to the next step.
Also read How to Jack Up a Car step by step
Remove the wheel and set it aside. Locate the brake callipers and rotor. Carefully undo the brakes and detach all the hydraulic pipes and cables. Find the axle nut at the centre of the wheel assembly. Remove the cotter pin using a pair of pliers and a can of lubricating spray. These parts may have rust or corrosion on them due to constant contact with dirt and water.
An impact wrench can be used to remove the axle nut. If you are having trouble getting the axle nut out, try using a pry bar to force it out. You should bring the car down, off the jack stands so that you can apply more pressure without jiggling the car, it is safer on the ground.
Loosen the bolts holding the steering knuckle and tie rods in place. Use a hammer if they are proving to be difficult or use a lubricating spray to get them moving.
Get to the strut and coil springs and take them out of their housing by undoing the bolts. You should have access to the drive shaft / CV axle now.
Also Checkout What is the difference between a strut and a shock absorber?
Use the pry bar to remove the CV joint from the transmission/differential. It should come out with a little force but be careful of spilling transmission fluid from the gearbox. Use an oil pan to collect any engine fluid.
Insert the new CV axle into the transmission and tap it with a mallet to secure it in place. Avoid using too much pressure because machined aluminium or steel parts can get scratched. The best replacement CV axles are the ones specified in your service manual. They will differ from vehicle model to car brand.
Assemble the loose end of the CV axle to the wheel hub and replace the suspension, coil springs, steering knuckle, tie rods and brake rotors/callipers.
It is best to replace the CV axle on the other side as well. If you are wondering how many cv axles are on a car, a front-wheel drive vehicle usually has two CV axles, one on the left and one on the right side.
Replace the axle nut and reassemble the wheel. The job is done and you can now lower the vehicle and take it for a test drive.
Also Read Difference Between Manual and Automatic Transmission
Conclusion
CV axles have the all-important job of transferring engine power to the wheel (via the transmission and differential). A poorly functioning CV axle is sure to ruin your driving experience and may even cause you to lose control or end up stranded on a highway.
Modern suspension and transmission make CV axles a sophisticated piece of equipment that has undergone years of evolution to provide smooth and stable driving. CV axles have to do their job while the wheel moves up and down with the suspension and turns at an angle around corners.
It is important to recognize symptoms of a bad CV axle and have them replaced as soon as possible. Carrying out the replacement at home is cost-effective and is an easy job if you follow instructions.
This article on CV axles should have enlightened you about this versatile mechanical component. For other such informative articles, have a look at a Discover the fundamental differences between driving gear and driven gear and What Is A Differential In A Car? or visit Carorbis Blog for articles.